Helios-44 M39 to M42 - DIY adaptation and infinity adjustment
- Mar 14, 2021
- 3 min read
Updated: Mar 14, 2021
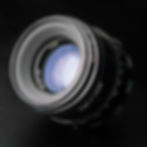
We all love Helios-44. Thank god there are a lot of different versions of Helios-44 in the world for us all to choose from. Many of them are in M42 mount, which is very easy to adapt to modern cameras. One simple adapter will do. But there are also a few interesting earlier versions in Zenit M39 mount (not quite the same as Leica M39 mount), like this beautiful black glossy metal zebra version shown above. For different reasons (collectability, price, look, blades, etc.) you may prefer the M39 versions to the M42 versions. Unfortunately, they are a little tricky to adapt on modern cameras.
First you need a M42 adapter for your modern camera, and a M39 to M42 adapter ring that allows you to screw the lens onto the M42 adapter. This ring (shown in the photo below) should be easy and cheap to find. (Oh, be careful not to screw the lens too tight onto the M42 adapter, otherwise you may have difficulty unscrewing the ring out from your adapter!)

However, this ring alone will not give you the full experience of your beautiful M39 Helios-44. As the flange focal distance of Zenit M39 mount (45.2mm) is slightly shorter than the M42 mount (45.46mm), a Zenit M39 lens on a M42 adapter will not be able to focus to infinity. Sad.
But luckily, it is a very easy fix!

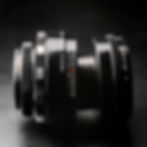
First, what you need to do, is to set the lens to infinity and close the aperture all the way down. Then hold both the preset and aperture ring and apply (quite) some force to unscrew (in normal anticlockwise direction) the optic group out from the helicoid. You should be able to separate the lens into two components shown in the photo below. It is easier if you wear rubber gloves.
Screw the optic component all the way out (takes quite some turns). You should notice a metal ring sitting freely in between the optic and helicoid components. It is the infinity adjustment ring. If you take this ring out and screw the optic component back in now, you should be able to use the lens on a modern camera and focus to infinity already.
But you if screw the components back tight, the aperture ring will also be too tight to turn. You cannot change the aperture.
But if you don't screw them back tight and leave them a little loose, when you adjust and turn the aperture ring, the whole optic component is going to turn as well. You will then need one hand to hold the preset aperture ring to keep the optic component in place, while the other hand turns the aperture ring.
Which is super annoying! (Trust me, I used the lens like this for a few weeks.....)
To fix this, you could try to thin the metal ring into the correct thickness with machines (theoretically it should be 0.26mm thinner?)... OR!

Here comes the next easy step to fix it. All you need is just a piece of paper with good thickness like a name card, paper from the food packaging, or cover of your notebook, etc.
On the paper, draw a ring with the same inner and outer diameter as the metal ring. Cut this ring out.
Replace the metal ring with this paper ring. When you screw the components back together, the paper ring should leave enough tightness for the helicoid to hold the optic component and enough room for the aperture ring to turn.

Voila, now you have a fully functioning Helios-44 lens in M42 mount that can focus to infinity! Enjoy and leave a comment if you find this trick useful!

